Gluten-Free Strawberry Tarts
Dreamy and creamy Gluten-Free Strawberry Tarts are made with a Greek yogurt filling, gluten-free crust, and no refined sugar. Indulge in this sweet treat for breakfast or dessert!
Your body will thank you when you start the day with something that’s not only light and nutritious but so fun to eat! The healthy ingredients in these Gluten-Free Strawberry Tarts will keep you feeling light and satisfied all day long. Enjoy them as a tasty breakfast treat or for an easy dessert.
Strawberry tarts are surprisingly easy to make. Prepare the gluten-free shortbread crust ahead of time and add the filling when it’s time for brunch. The healthy and bright Greek yogurt filling is easy to mix together in a pinch. Top them off with beautiful fresh strawberries and you have a light and refreshing addition to the brunch table!
These tasty tarts would be delicious with a dollop of Rhubarb Raspberry Jam on top or after a serving of my Rhubarb Granola Breakfast Bake.
Shortbread Crust Ingredients
This buttery and delicious shortbread crust is a healthy and easy alternative to regular tart pastry crust. It’s naturally sweetened with dates and uses 100% gluten-free flour. All of the ingredients bind together to make an easy gluten-free dough!
This is what you need to make gluten-free shortbread crust:
- Dates
- Butter
- Gluten-free rolled oats
- Gluten-free all-purpose flour mix
- 1 egg
Are all oats gluten-free?
Unfortunately, not all oats are gluten-free. This is because oats are sometimes contaminated as they are processed in facilities that also process other grains, like wheat, rye, and barley. Make sure to read the packaging carefully to ensure the oats you want to use are certified gluten-free.
I would recommend using Bob’s Red Mill old fashioned gluten-free rolled oats. This variety will not only help bind the tart pastry crust together but also fill you up. Instant oats will not work in this recipe.

How to make tart crust
Who knew gluten-free tart crust could be so easy? All you need is a food processor or hand blender to combine the ingredients until a dough forms.
Follow these steps to make your own gluten-free tart crust:
- Remove the pits from the dates and discard. Add the pitted dates to your food processor. Next, add in the butter, rolled oats, and flour, then pulse together until the dough is crumbly. The dates will make the crumbly dough feel lumpier than the regular shortbread dough you might be used to.
- Add the egg into the food processor. Pulse until it’s combined with the rest of the ingredients and a non-sticky dough has formed.
- Grease your tart tins and line them with long, thin strips of baking paper. The baking paper helps to remove the tart crusts from the tins once they have been baked.
- Remove the ball of dough from the food processor and divide it into 5 equal parts. Press each section evenly into the tart pans. The crust will be quite thick.
- Put the tart pans with the crust in the fridge and let them rest for 30 minutes.
Strawberry Tart Filling Ingredients
The strawberry tart filling is super fresh and light. You can make it in no time using just a few simple ingredients.
This is what you need to make the filling for the strawberry yogurt tarts:
- Natural Greek yogurt
- Fresh basil leaves
- Fresh mint
- Vanilla extract
- Honey
- Strawberries
Should I use fresh or frozen strawberries?
I would recommend using fresh strawberries in this recipe. Fresh berries will give you the best texture and flavor, whereas frozen will end up soft and mushy once they thaw.
How to make vegan tarts
You can easily use vegan substitutions in this recipe to create a strawberry tart that is both gluten-free and vegan. Simply replace the butter with a vegan butter substitute, use your favorite kind of plain plant-based yogurt, swap the honey for maple syrup, and replace the eggs with flaxseed or chia eggs.
To make a flaxseed or chia egg, add 1 tablespoon of ground flax meal or chia seeds to a small bowl, then add 3 tablespoons of water. Mix and let it sit for 10 minutes. When it’s ready, it will mimic the texture and properties of a chicken egg.
How to make these
The tart filling will take you no time at all to prepare. Once it’s done, you can focus on baking your crusts to perfection.
These helpful steps will guide you through making the tart filling, baking the crusts, and putting the tarts together:
- Make the strawberry tart filling by chopping the basil and mint leaves and very finely. Add the yogurt to a medium bowl. Stir in the herbs, vanilla, and honey.
- Slice off the strawberry stems and dice the strawberries. Leave the filling and strawberries in the fridge until it’s time to put the tarts together.
- Preheat the oven to 180ºC or 350ºF.
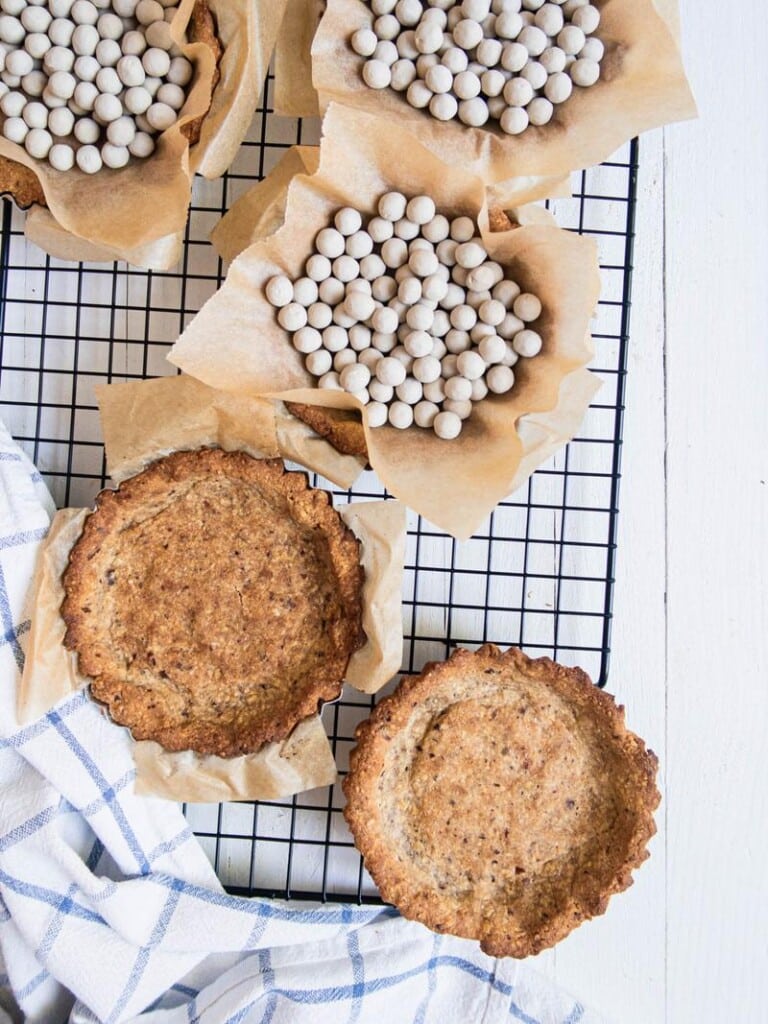
- Remove the tart pans from the refrigerator. Add a small piece of parchment paper on top of each crust and fill the paper with ceramic baking beads or pie weights. The weights in the center of each tart will prevent the crust from forming air pockets or shrinking as it bakes.
- Put the tarts in oven and bake for 20 to 25 minutes or until crispy edges form.
- When the crusts have finished baking, let them cool on a cooling rack.
- As soon as the crusts have cooled down to the point you can handle them without burning your fingers, carefully remove them from the tins. Leave them to cool completely before filling them.
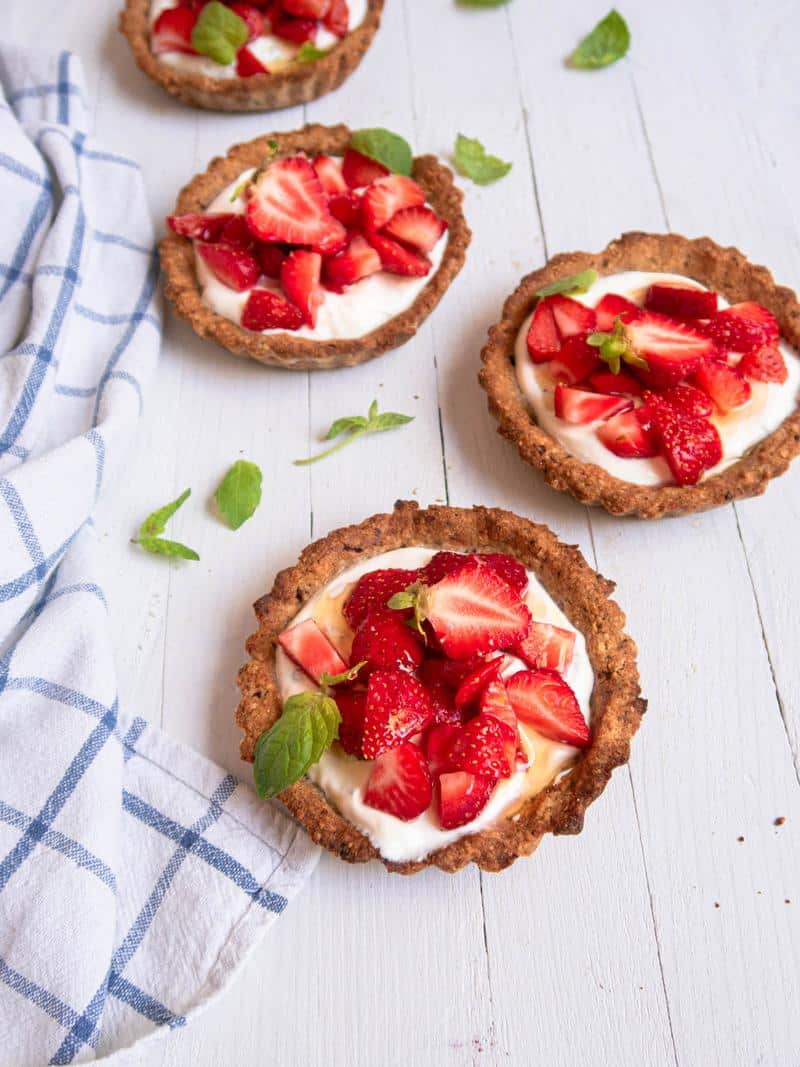
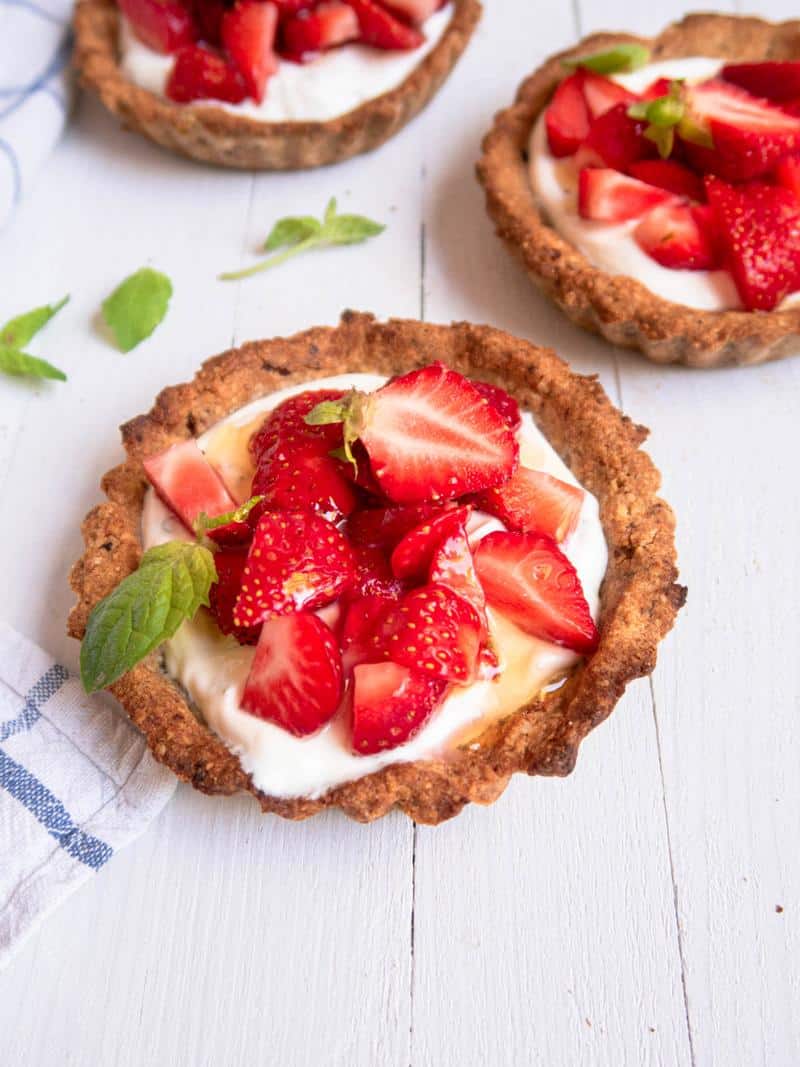
- Once the crusts are cool, spoon the yogurt filling into each tart and then add the diced strawberries on top. Garnish with mint leaves and serve right away.

Making this recipe ahead of time
The tart crusts can be made one day ahead of time if you want to save time. They will need to be stored at room temperature in an airtight container.
You can also freeze the tart crusts. Freeze them separately in their tins or place them all in a freezer bag once completely frozen. Remove the crusts from the bag and thaw at room temperature.
Unfortunately, the tarts can’t be filled in advance and then stored away. Enjoy them immediately to avoid soggy crusts.
Equipment needed
You only need a few tools to make these easy tarts:
- Food processor or hand blender with accessories: If you don’t own a food processor, use a hand blender instead.
- Five 4-inch tart tins or one loose bottom 10-inch pie pan (to make one large tart).
- Ceramic baking beads: Pie weights are essential for an evenly baked crust. You could even use dried rice or legumes instead.
- Cooling rack
More berry dessert recipes
Summertime is made even more enjoyable when you can indulge in fresh berries! Try these tarts along with these other tasty berry recipes:
- Peanut Butter Strawberry Popsicles
- Lingonberry Nice Cream
- White Chocolate Raspberry Bars
- Raw Vegan Strawberry Cheese Cake
- Berry Ice Cream Popsicles

Gluten-Free Strawberry Tarts
Equipment
- Food processor
- 5 4-inch tart tins
- Ceramic baking beads
- Cooling rack
Ingredients
Shortbread crust
- 80 g soft fresh dates 5-8 dates
- 100 g butter
- 70 g gluten-free rolled oats
- 110 g gluten-free all-purpose flour mix 2 dl
- 1 egg
Filling/topping
- 250 ml / 1 cup natural Greek yogurt
- 1 tablespoon chopped fresh basil leaves
- ½ tablespoon chopped fresh mint + some whole leaves to garnish
- ½ teaspoon vanilla extract
- 1 tablespoon honey
- 200 g strawberries
Instructions
Prepare the crusts
- Remove the pits from the dates and discard. Add the pitted dates to your food processor. Next, add in the butter, rolled oats, and flour, then pulse together until the dough is crumbly. The dates will make the crumbly dough feel lumpier than the regular shortbread dough you might be used to.
- Add the egg into the food processor. Pulse until it’s combined with the rest of the ingredients and a non-sticky dough has formed.
- Grease your tart tins and line them with long, thin strips of baking paper. The baking paper helps to remove the tart crusts from the tins once they have been baked.
- Remove the ball of dough from the food processor and divide it into 5 equal parts. Press each section evenly into the tart pans. The crust will be quite thick.
- Put the tart pans with the crust in the fridge and let them rest for 30 minutes.
Bake the crusts
- Preheat the oven to 180ºC or 350ºF.
- Remove the tart pans from the refrigerator. Add a small piece of parchment paper on top of each crust and fill the paper with ceramic baking beads or pie weights. The weights in the center of each tart will prevent the crust from forming air pockets or shrinking as it bakes.
- Put the tarts in oven and bake for 20 to 25 minutes or until crispy edges form.
- When the crusts have finished baking, let them cool on a cooling rack.
- As soon as the crusts have cooled down to the point you can handle them without burning your fingers, carefully remove them from the tins. Leave them to cool completely before filling them.
Prepare the filling and fill
- Make the strawberry tart filling by chopping the basil and mint leaves and very finely. Add the yogurt to a medium bowl. Stir in the herbs, vanilla, and honey.
- Slice off the strawberry stems and dice the strawberries. Leave the filling and strawberries in the fridge until it’s time to put the tarts together.
- Once the crusts are cool, spoon the yogurt filling into each tart and then add the diced strawberries on top. Garnish with mint leaves and serve right away.
Tips
Baking times are an estimate, every oven is different. Monitor the tarts closely at the end of the baking.